Morgan Myers | 05/03/2021
Recently, I became aware that the video series I had previously used to construct garb was removed by the author; due to the incontrovertible misappropriation of medieval Scandinavian imagery, religion, etc. by white supremacists—particularly following the 2021 riots at the US Capitol. While her decision to shift interests is more than understandable, her videos were the best example of Viking age dress construction I’ve able to find.
I suspect most of her research was based on the work of Hilde Thunem, but thoroughly covered how one might construct a similar dress from their own measurements.
From my notes on prior dresses, I’ve done my best to somewhat recreate the tutorial below:
SECTION 1: MEASUREMENTS
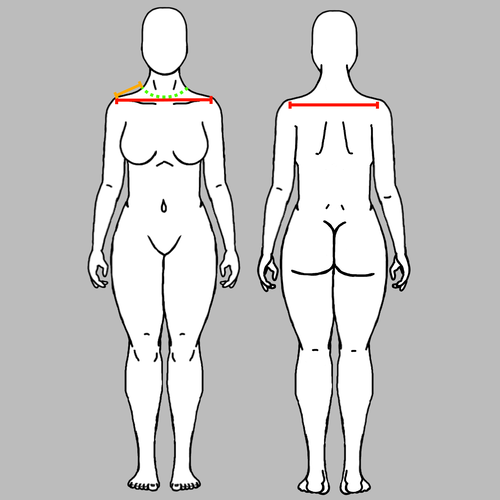
Figure 1.1 Measurement of shoulders and neckline
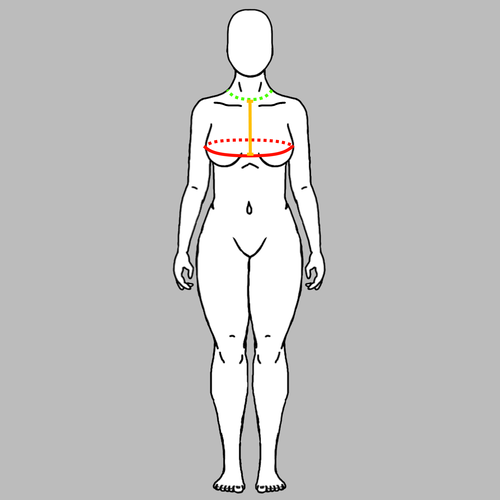
Figure 1.2 Bust measurement
Find a comfortable, tight-fitting t-shirt. If this is an overdress, or any undergarment will be worn underneath, put that on under the t-shirt for the best fit.
Figure 1.1: Shoulder width: Measure from shoulder seam to shoulder seam (red lines), on both front an back. In males, particularly, the back measurement tends to be slightly wider than the front. Take the average of these two values. The second measurement, shoulder length, is measured from the top of the shoulder (yellow), from seam to the edge of the neckline (green). At this time also note if your shoulders are more flat, or sloped.
Figure 1.2: Bust measure the circumference of the chest at the widest point (red), in a deep inhale. It’s important to reiterate here that if you plan to wear a bra underneath, wear it during this measurement. I’ve found its helpful to add another inch to this measurement. Measure perpendicular to this circumference (yellow) to the neckline (green), chest depth.
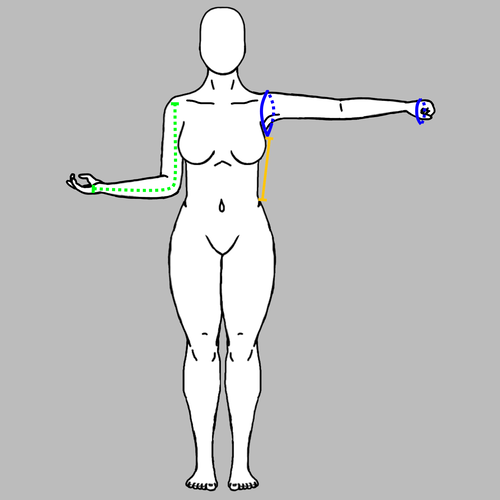
Figure 1.3 Measurement of sleeves and sides
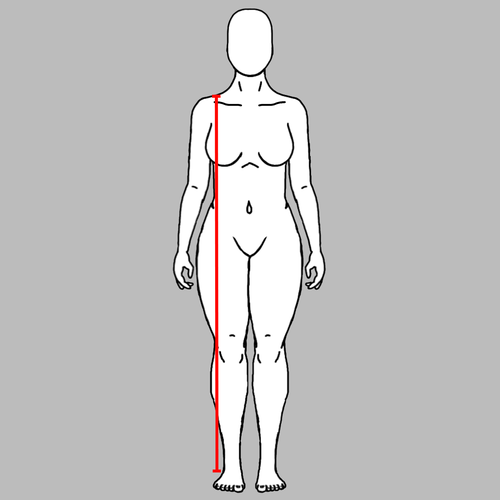
Figure 1.4 Length measurement
Figure 1.3: Sleeve upper: extend your arm out and make a loop around the shoulder (proximal blue)—make an upside-down teardrop shape, pinch at the point. Move your arm around and make sure that you can comfortable move about without binding; adjust as needed. Measure from the point of the teardrop to the top of the hip (yellow), side. Measure the circumference of your fist (distal blue), sleeve lower. Finally, measure from the shoulder seam, down the arm, around the elbow, to wherever you want the sleeve to end (green), sleeve length. Make sure your arm is bent during this measurement, so your sleeves don’t end up too short.
Figure 1.4: Dress length: Easiest measurement yet! Simply measure from the shoulder apex, near the neckline, drape across the breast, and take the measurement at whatever final length you wish the dress (or tunic) to be (red).
SECTION 2: DRAFTING THE DRESS
Handwoven fabric was generally 2 ells in width, but modern fabric is usually an awkward width, at ~3 ells. I usually fold my fabric (4 yards x 54 inches) lengthwise, and sketch it into thirds, using a 2 ell section for the main dress body, and the 1 ell side strip, and base strip, for gores, sleeves, etc. Additionally, since its folded in half, I get 2 of each piece, without needing to re-measure. If 2 ell fabric is being used, and accounting for side and front gores, about 11 ells are needed.
Whatever the case, iron the fabric flat, and fold as intended.
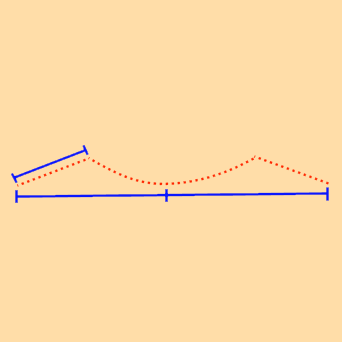
Figure 2.1 Shoulder construction
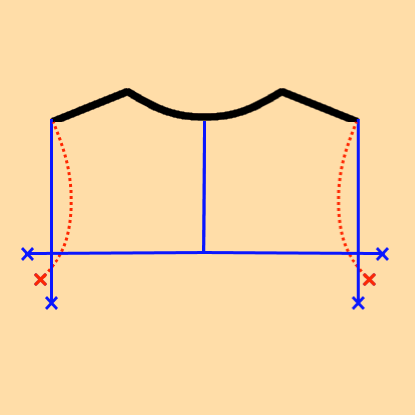
Figure 2.2 Sleeve construction
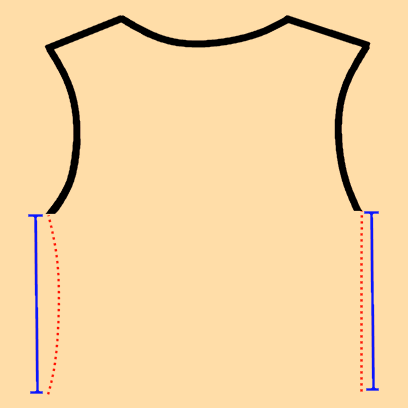
Figure 2.3 Waist construction
Figure 2.1: Make a mark halfway across your fabric (1 ell in my case). If your shoulders are sloped, put a mark the approximate rise of your shoulders down the midline (1 inch works for most people, increase or decrease as needed). From this line, measure out half the shoulder width measurement each direction. Mark a line from the edge of the shoulder width, with the shoulder length line. Trace a curve from point-to-point, dipping to the shoulder width line, as shown.
Figure 2.2: This part is by far the trickiest, but most important to a fitted look. Take 1/2 of the sleeve upper length, and mark an “x” straight down from the corner of the shoulders. From the base of the neckline, measure chest depth down and then, perpendicular, 1/4 of the bust, each direction, and mark another “x”. Find the midpoint between these two x’s. Make an arc from the corner of the shoulder, to the X, the length of sleeve upper. Either of these may be higher or lower than pictured; I tend to measure my sleeve upper a little long allowing for comfortable movement in the arm.
Figure 2.3: Measure straight down with the side measurement. I find its easiest to leave this straight, and pin the hourglass while on my body to get a better fit. Seaming along the hourglass also pulls the dress down and makes the fit across the chest more comfortable.
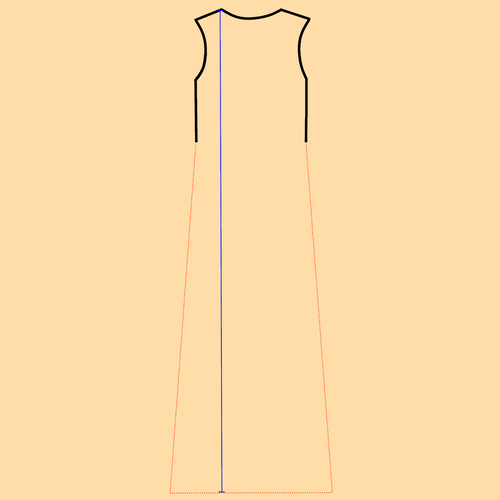
Figure 2.4 Dress Length
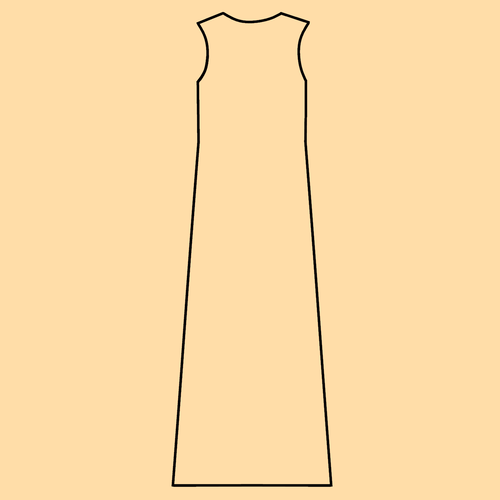
Figure 2.5 Final dress body
As it was measured in figure 1.4, the mark the dress length from the corner of the neckline. Draw a line, perpendicular, edge to edge (so the dress front is, at most, 2 ells wide). Connect the edge of the hips to the end of the dress with a straight line.
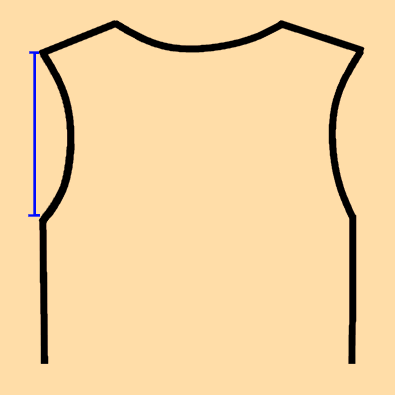
Figure 2.6 Sleeve width measurement
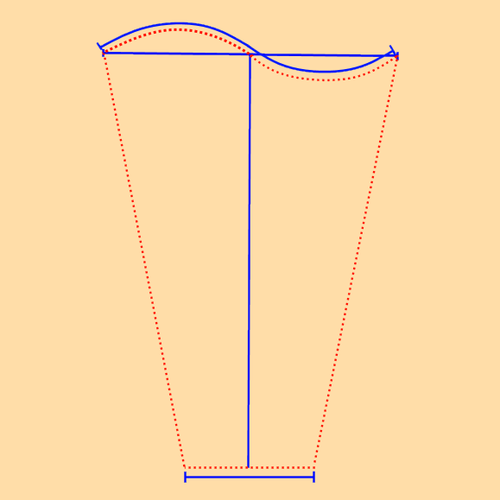
Figure 2.7 Sleeve construction
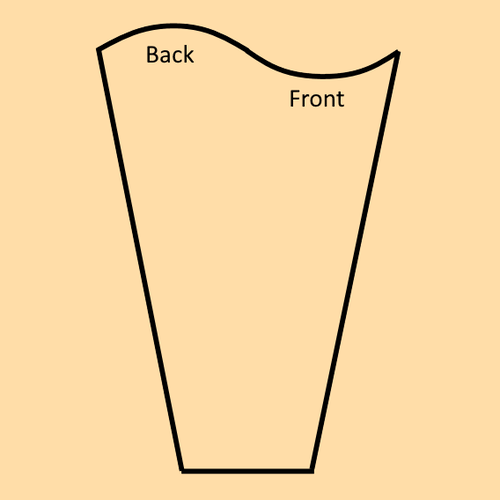
Figure 2.8 Final sleeve body
Measure point-to-point on the final dress body to yield the sleeve width. From the midpoint of fabric used for the sleeve, measure out the sleeve width each direction, measure down the sleeve length, and from the base, 1/2 the sleeve lower each direction. At the top, make a curve the length of the sleeve upper; I’ve found it easiest to trace the sleeve hole from the dress body (transferred via paper due to the seam allowance left on the dress), and use it to duplicate the wave shown in figure 2.8. The curve is important to allow movement; the + arc being stitched to the back of the dress, allowing you to move your arms forward easily.
SECTION 3: SEWING TOGETHER
Add a 1/2” or more seam allowance to all the pieces above before cutting out. I whip-stitch all my edges before sewing everything else—this isn’t so much an issue with wool, but linen tends to fray rather badly. Starting across the shoulder line, pin and stitch together, leaving an inch or so unstitched by the neck hole. If adding a facing, inner or outer, to the neckline, I generally do it at this stage, since more handling=more fraying around the neckline (here is a decent guide to a simple, sturdy neckline). I then stitch the sides down to where it begins to flare, sew the sleeves into tubes, and then attach the sleeves—remember which side of the sleeve is front and back.
SECTION 4: GORES AND FINAL HEMS
Depending on your remaining material, there may only be enough for the sides, and there’s many combinations that can be done (including gores that split the main body of the dress). Essentially for gores, use a triangular piece of fabric, with hypotenuse the length of the remaining fabric below the hip stitching. Isosceles, right-triangles, or two right triangles together could all be used here, depending on needs and materials—preplanning using the above is key.
Make any adjustments needed (if too tight across the chest, or pinching in the armpits, the addition of a diagonal/square gusset will help: gussets are attested in several Birka finds), hem the base of the body and the mouth of the sleeves, and finally, if desired, fell all the seams—this helps with how the dress lays in the end, and keeps the fabric edge doubly safe from damage.