Morgan Myers | 06/07/2021
The tent is finally complete!
In 2020 we purchased a home (not to mention the pandemic aproductivity putting a strain on life), so this project was sadly pushed to the backburner for some time, until I completed pressing renovations around the home.
At Pennsic 2020, I was hoping to find some $10/yard wool again, but well, not much was able to happen in 2020. I ended up settling for 8oz. plain weave linen, and it has worked wonderfully. Initially, I intended to dye the fabric in an indigo bath, but I opted to color match the fabric with RIT dye to some smaller scale woad experiments—US customs delaying delivery, compounded by munching deer spoiled most of the woad I had intended for the project.
The linen I purchased was 60” wide; much wider than what was available at the time of the original. I split all the fabric lengths in half, to a more manageable, and historically reasonable width. All seams are “flat felled” to maximize strength and minimize rain’s ability to penetrate. All the wood has been treated with linseed oil to prevent water damage—hopefully it won’t yellow too harshly with time, I will update this post as time goes on with any adverse events. I’ve seen mention of pine-pitch being a likely period alternative (with it’s own drawbacks and advantages). I’ve opted to add loops and stake the tent down, due to wind, despite the only evidence for the practice being some tension tools found (possibly for the cross-ropes, possibly for guy lines), but no stakes. One of the horizontal rods from the small Oseberg A-frame find is recorded as having holes bored through it, possibly for the fabric to tie-down for tension, however, this is not reflected on the other ground-running rod, and the two poles are of different lengths, so possibly the pole was misattributed. Many of the Oseberg A-Frame vertical poles have holes, likely for securing the inside of the fabric. This addresses a change I made to the Gokstad tent: the end of the poles have a semicircular hole along the edge (figure 2), rather than a circular hole passing through the center, as the Oseberg boards. This is similar to the description of the “House Tent’s” top boards, from Osebergfundet Bind II:
(p.267-8) “No. 307. Two four-sided rods of ash of the same general shape as No. 212, which have been placed in the same manner as this: with one end crossed and the other end attached to the crossbars of the framework. The poles were a kind of vindskier (eaves).
A) One rod is 1.56 m long and 5 cm wide in the middle, where the thickness is 2.s cm. [Omitted description of the miter at the other end of the board]. At the upper end, the shape is as indicated in No. 212 B above. In the middle is placed a round hole for a nail and on one side, a semicircular hole is cut out. The posts A and B are, according to Gustafson's assumption, placed crosswise with the semicircular cuts facing one-another.”
See figure 1 (from the above description), and compare with the Gokstad base, figure 2 below). I had previously hypothesized the Gokstad tent may have been used on a the ship while traveling, and the semicircular base affixing to the edge of the ship (lent to by the missing cross-beams and longitudinal poles), but this analogous structure in the Oseberg tent makes me think otherwise. The Oseberg tent only has one nail in-situ, and I can only speculate as to why its not flush (stood off as a tie, worked itself out as the wood decayed, ect). Furthermore, no fragments I can find correspond to a collar-tie that the nail would be seated in, but it may not have survived.
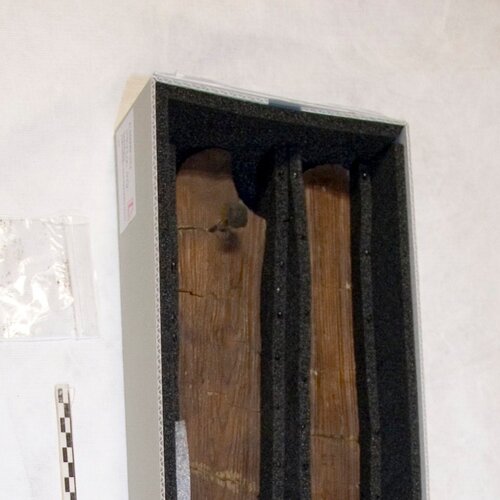
Figure 1. Oseberg house tent apex, fragment 212b.
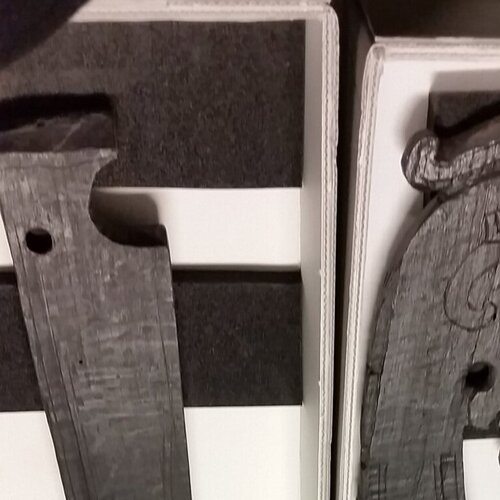
Figure 2. Base of the Gokstad tent, note the relatively offset (not medial to the center of the semicircle) hole, and semicircle's angle.
I did not include internal straps, as the Oseberg A-frames must-have, however, adding them in the future would be feasible, tying around the pole entirely, rather than needing holes cut to pass through.
A couple miscellaneous asides: the end-flaps have a diamond pattern inspired from the many depictions of Viking age sails (figures 3&4) with diamond/checkered patterning. Due to the relative prevalence of this motif in representations of viking age ships, I’m not sure why its excluded from most replica ships (aside from the complexity/time consumption). Another note, the Oseberg tents had mortises on the tenons of the horizontal poles for pegs, however, with the tensioned rope, and trapezoidal side-profile, these are completely unnecessary.
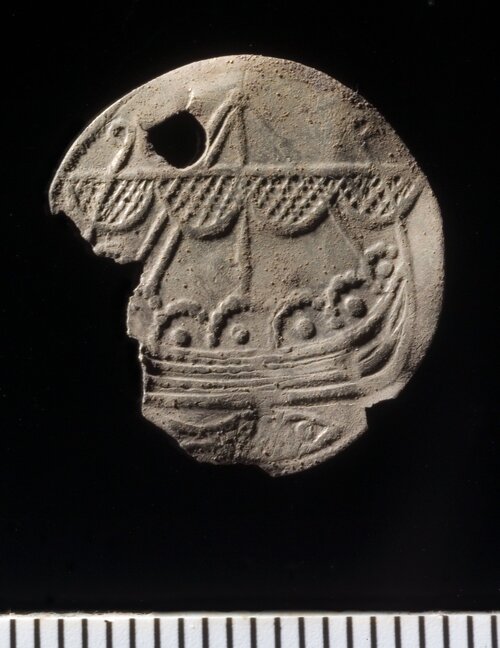
Figure 3. A Viking-age coin pendant with checkered sail design

Figure 4. Tjängvide image stone depicting a number of interesting features; women’s hair. Sleipnir, but also a ship with checkered sail.
Over the next year or so, I plan on constructing a replica of the Oseberg house tent using what I’ve learned over the course of this project. In my preliminary research and testing (and to reiterate Part 1 of this post), the sail-tentfly hypothesis may be possible with the house tent—the replica ship “Saga Oseberg” used a sail of 90 square meters, but the house tent could be covered by a sail of 6.9x5.9 meters: around half the size proposed in the replica; either from a smaller ship, or possibly a stand-alone covering.
Figure 5. Front of tent, see Figure 1. (3b and 2a) from Part 1.
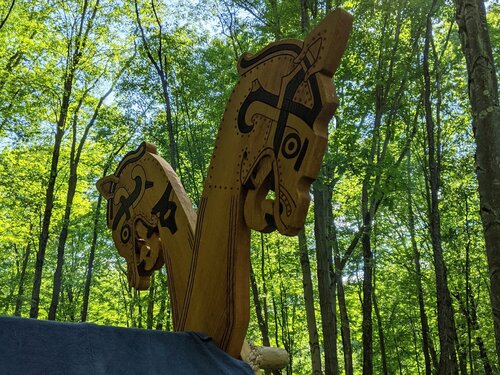
Figure 6. Front of tent, see Figure 1. (2b and 3a) from Part 1.
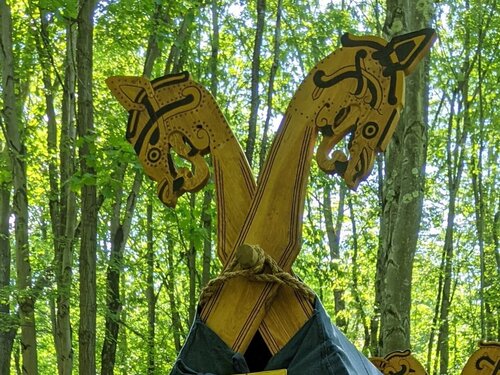
Figure 7. Front of tent, see Figure 1. (5b and 4a) from Part 1.
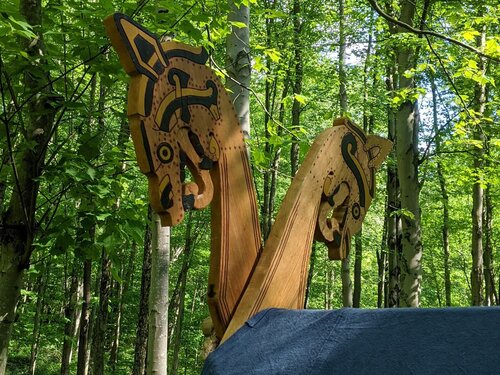
Figure 8. Front of tent, see Figure 1. (4b and 5a) from Part 1.
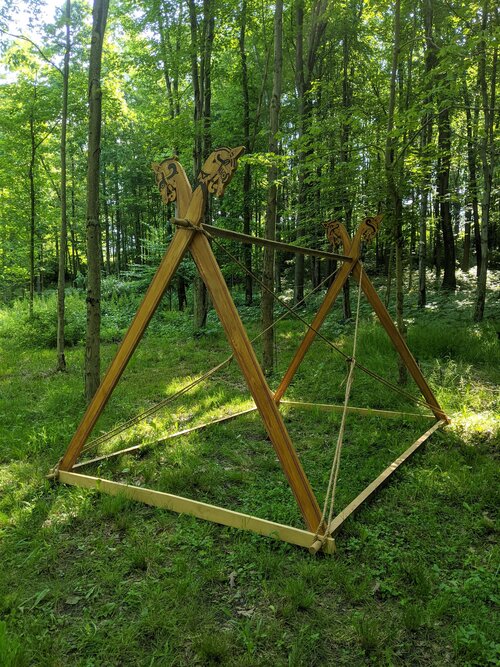
Figure 9.Skeleton of the tent, note the ridge pole is a bit shorter than the ground-running poles, forming an isosceles trapezoid: adding substantial rigidity.
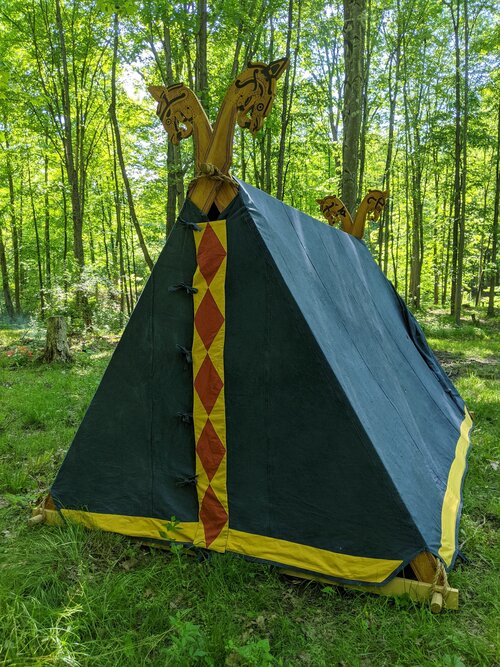
Figure 10. Rear side of the tent, closed. The bottom looks uneven here due to uneven tensioning.
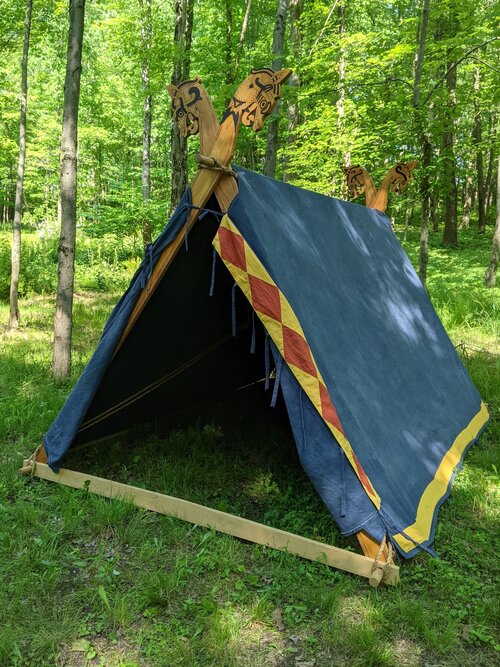
Figure 11. Front side, open. Adding internal straps (mentioned above) to keep the endflaps in place would be beneficial here.
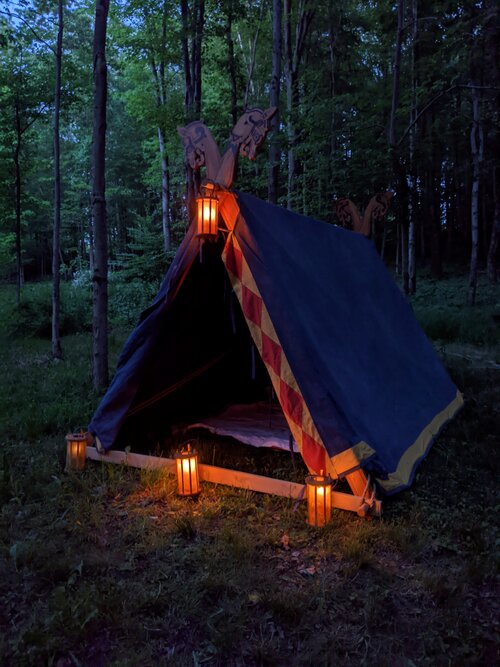
Figure 12. Tent in the evening, lanterns are anachronistic: based on some late finds from Sweden. Fat lamps would be more accurate, but prohibitively dangerous around a tent.